The Integrations page inside Weevio Cloud is the central hub for connecting and monitoring every third-party service your store uses. Each integration has its own tile with setup actions, status, and links to provider-specific configuration.
This page covers the in-app hub itself — what you see, how to navigate it, and which integrations live there. For step-by-step setup of an individual integration, follow the links to its dedicated documentation.

Opening the Integrations Hub
Sign in to Weevio Cloud as a staff user, then select Integrations from the left sidebar. The hub loads with each available integration rendered as its own tile.
Which integrations are visible?:
The tiles you see depend on the features your tenant has purchased. Vendor Integrations, for example, only appear if your plan includes the Shopify vendor integrations add-on. Contact your Weevio Cloud account team if a tile you expect is missing.
Available Integrations
The hub groups integrations into rows by type:
Core Integrations
- PIMS — Connect your PIMS Platinum or Gold system so orders, inventory, customers, and repairs stay in sync. See Weevio Store for the features this unlocks.
- Shopify — Connect one or more Shopify stores for real-time inventory, the Product Page widget, Cart widget, and automatic order sync. Full setup is documented under Shopify Integration.
- USPS / EasyPost — Configure shipping carrier credentials so rates and labels are available inside orders.
Service Integrations
- GSX — Apple Global Service Exchange integration for AASPs. Used by the Appointment Scheduler GSX Integration and for repair reconciliation across multi-location SROs.
- Vendor Integrations (optional add-on) — Connect wholesale distributors including Ingram Micro, TD Synnex, and B2B Wholesale Solution to source stock and send vendor shipping notifications to customers.
Payments
- Stripe — Connect a Stripe account to accept online card and ACH payments through the Customer Portal and other customer-facing surfaces.
What Each Tile Shows
Every integration tile on the hub includes:
- The integration logo and name.
- A short description of what the integration does.
- A Setup or Manage action that opens the integration's configuration view inside Weevio Cloud.
- Status information (where applicable) — for example, whether credentials are connected, whether sync is healthy, or whether a required setting is missing.
- Contextual Help links that jump to the relevant section of this documentation site.
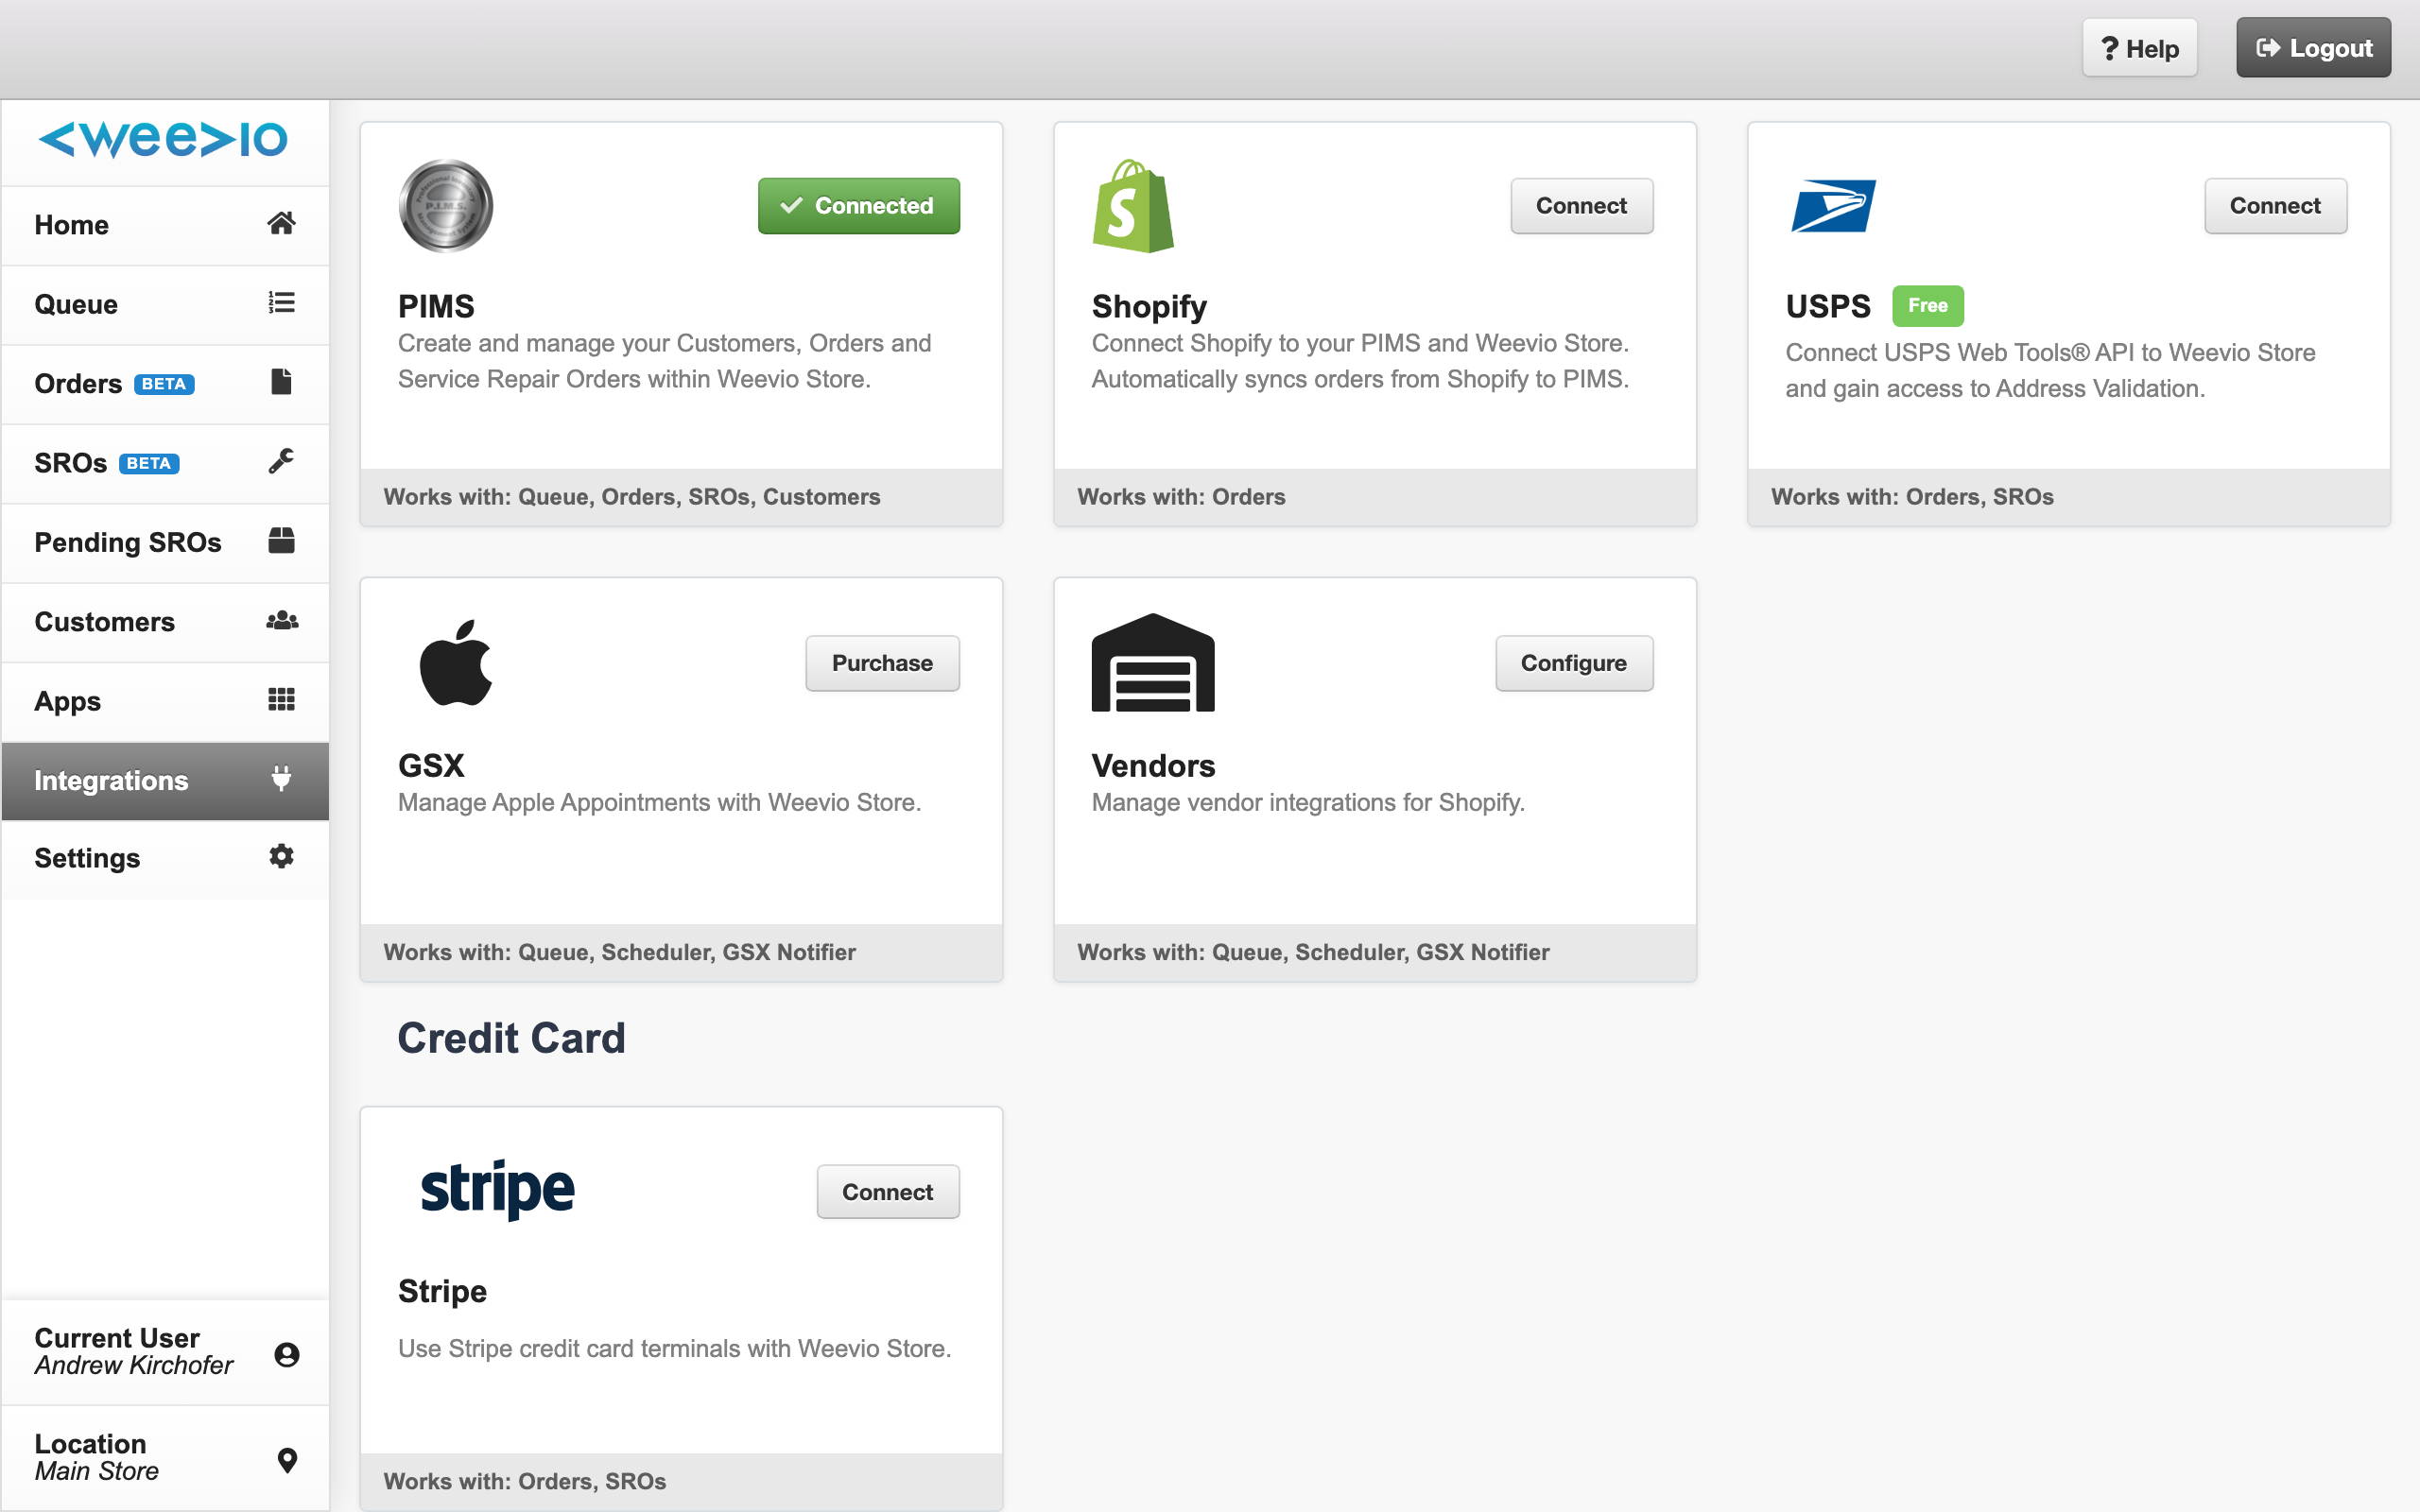
The PIMS "Connected" Badge
The Connected badge on the PIMS tile reflects the live backend connection between Weevio Cloud and your PIMS server — not just whether you personally are signed into PIMS in this browser session. The hub re-checks the connection using the saved Server URL, Server Port, and API credentials, so:
- Connected means Weevio Cloud can currently reach your PIMS server with the saved values.
- Connect (no green badge) means the saved values don't reach a working PIMS server — open the tile and verify the credentials.
- The status matches what the PIMS API Connection settings page reports — see PIMS Settings.
Note:
Shopify's tile continues to use session-based status — it reflects whether your Shopify OAuth session is active in this browser. Only the PIMS tile uses a live backend connection check.
Typical Setup Flow
Each integration has its own flow, but most follow the same pattern:
Open the integration
From the Integrations hub, click Setup (or Manage if already connected) on the integration you want to configure.
Authenticate
Sign in or paste API credentials for the third-party service. Integrations that use OAuth (for example Shopify) open the provider in a new tab so you can approve the connection there.
Configure settings
Adjust integration-specific options — sync toggles, default locations, notification preferences, and any feature flags exposed by that provider.
Verify the connection
Return to the Integrations hub. The tile should now show a healthy status and the Setup button becomes Manage.
Coming back from an OAuth tab:
When you finish authorizing an integration in a new tab and switch back to Weevio Cloud, the hub automatically refreshes integration settings so the updated connection status appears without a manual reload.
Per-Location Settings
Many integrations support per-location configuration — for example, a separate Shopify store or a different GSX Ship-To Code for each of your physical locations. After connecting an integration globally, use the Manage action to open its detail page, where you can adjust settings per location.
For a cross-reference of which Weevio Cloud features depend on which integrations, see the main Integrations index.
Troubleshooting from the Hub
The Integrations hub is the fastest place to diagnose connection problems:
- A tile that shows a disconnected or error status means credentials are missing or have expired. Open it and re-authenticate.
- If the PIMS tile shows Connect instead of Connected, the saved Server URL, port, or credentials don't reach a working PIMS server. Open the tile and verify the values, or see Startup Sign-In Issues if the Weevio Cloud sign-in screen hangs on "Signing into PIMS...".
- If Shopify shows sync issues, open the integration and check the PIMS Sync status panel — see Shopify PIMS Sync for details.
- If GSX stops syncing appointments, the GSX certificate may have expired. Re-upload a current certificate from the GSX integration's Manage view.
- For vendor integrations, check that the vendor-specific API credentials are still valid and that the feature is enabled for the locations you expect to use it on.
Integrations vs. Apps:
Integrations connect Weevio Cloud to outside services (Shopify, PIMS, GSX, shipping carriers, Stripe). Apps — available from the separate Apps page in the sidebar — are Weevio-built add-on experiences such as the Customer Portal, Queue, and Appointment Scheduler. Use Integrations for third-party connections and Apps to open Weevio's own customer-facing tools.
Need Help?
For assistance, please send a message to our Support page.