POS Order is the counter sales workflow. Build the document the customer needs — a quick worksheet, a formal quote, a sales order, or an invoice — add the lines, attach the customer, and take payment without leaving the screen.
Order Types
POS supports four order types. You can convert between them as the transaction progresses:
| Type | Use it for |
|---|---|
| Worksheet | A working draft. Use this while you're building up an order before committing it. |
| Quote | A priced proposal you can share with the customer to lock in pricing. |
| Sales Order | A committed order, typically used for fulfilment, pickup, or backorders. |
| Invoice | The final document, ready for payment. Once paid, the invoice is locked from further edits. |
Switch the order type from the header at any point. Weevio Cloud prompts you if the conversion needs additional information — for example, when promoting a worksheet to an invoice without payment.
The Order List
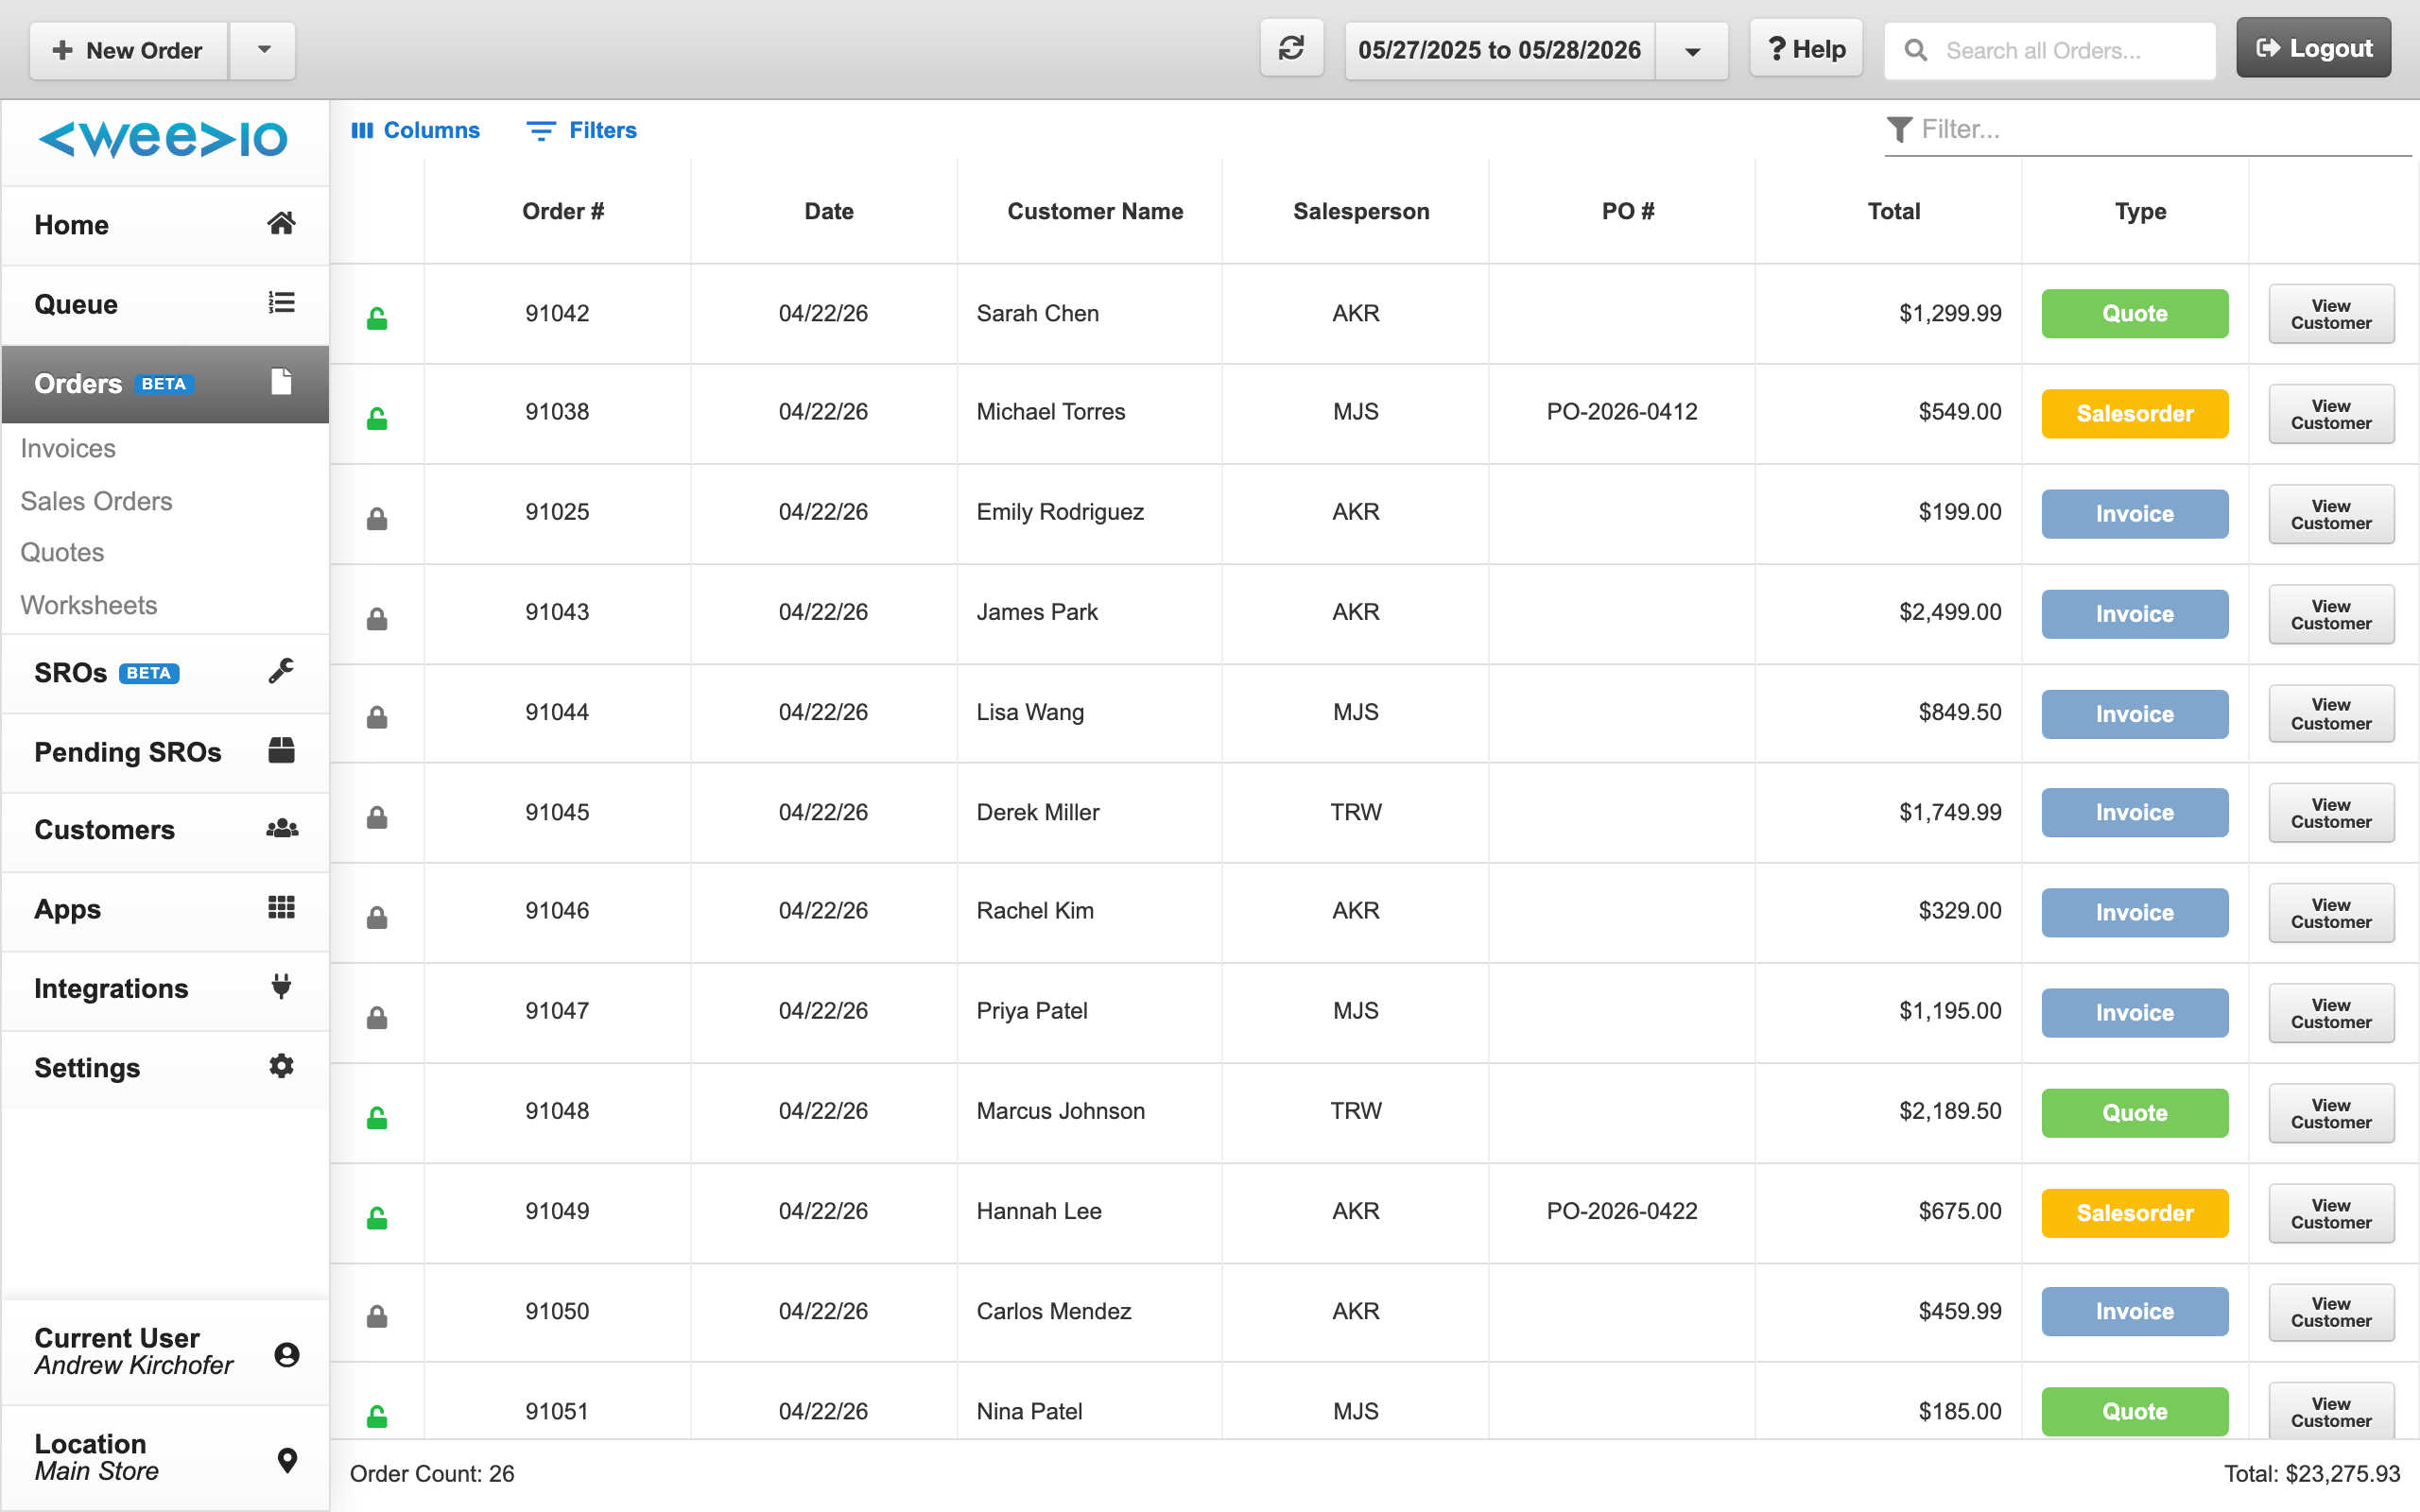
Opening Point of Sale → Order takes you to the order list, a searchable table of every order created at this location.
Filtering and searching
The left sidebar narrows the list by type and date:
- Type filters: All Orders, Invoices, Sales Orders, Quotes, Worksheets
- Date filters: Today, Past 7 days, Past 30 days, Past 3 months, This Year
Each row shows the order number, date, customer, salesperson, PO number, total, and a colour-coded type label. A lock icon on a row means the order is locked from edits — typically a paid invoice or a voided order. Click any row to open the order in a new window.
The View Customer action on the row menu jumps straight to the customer's record without opening the order.
Creating an Order
Start a new order
From the order list, click New Order. POS opens with the order type set to Worksheet by default — change this from the header if you already know which document the customer needs.
Attach the customer
Click the customer chooser in the header to search by name, phone, email, or account number. The customer's default shipping address and salesperson load automatically.
Add line items
Type a part number directly in the line, or click the search icon to open Search Inventory and pick a product by name, SKU, or category. Once a part is on the line, Weevio Cloud shows live quantity on-hand for your location.
Adjust quantity, price, and discount
Enter the quantity sold. Use the Discount link on the line to apply a customer price code, a percent off, or a flat amount; the line extension updates immediately.
Convert to invoice and take payment
When the customer is ready to pay, switch the order type to Invoice and click Make Payment. The payment screen lets you split the total across the tender types your tenant has configured in PIMS.
Print and close
After payment, use the print menu at the bottom of the screen to send the receipt to your default printer, or pick a specific Forms Designer template from the dropdown.
Line Item Features
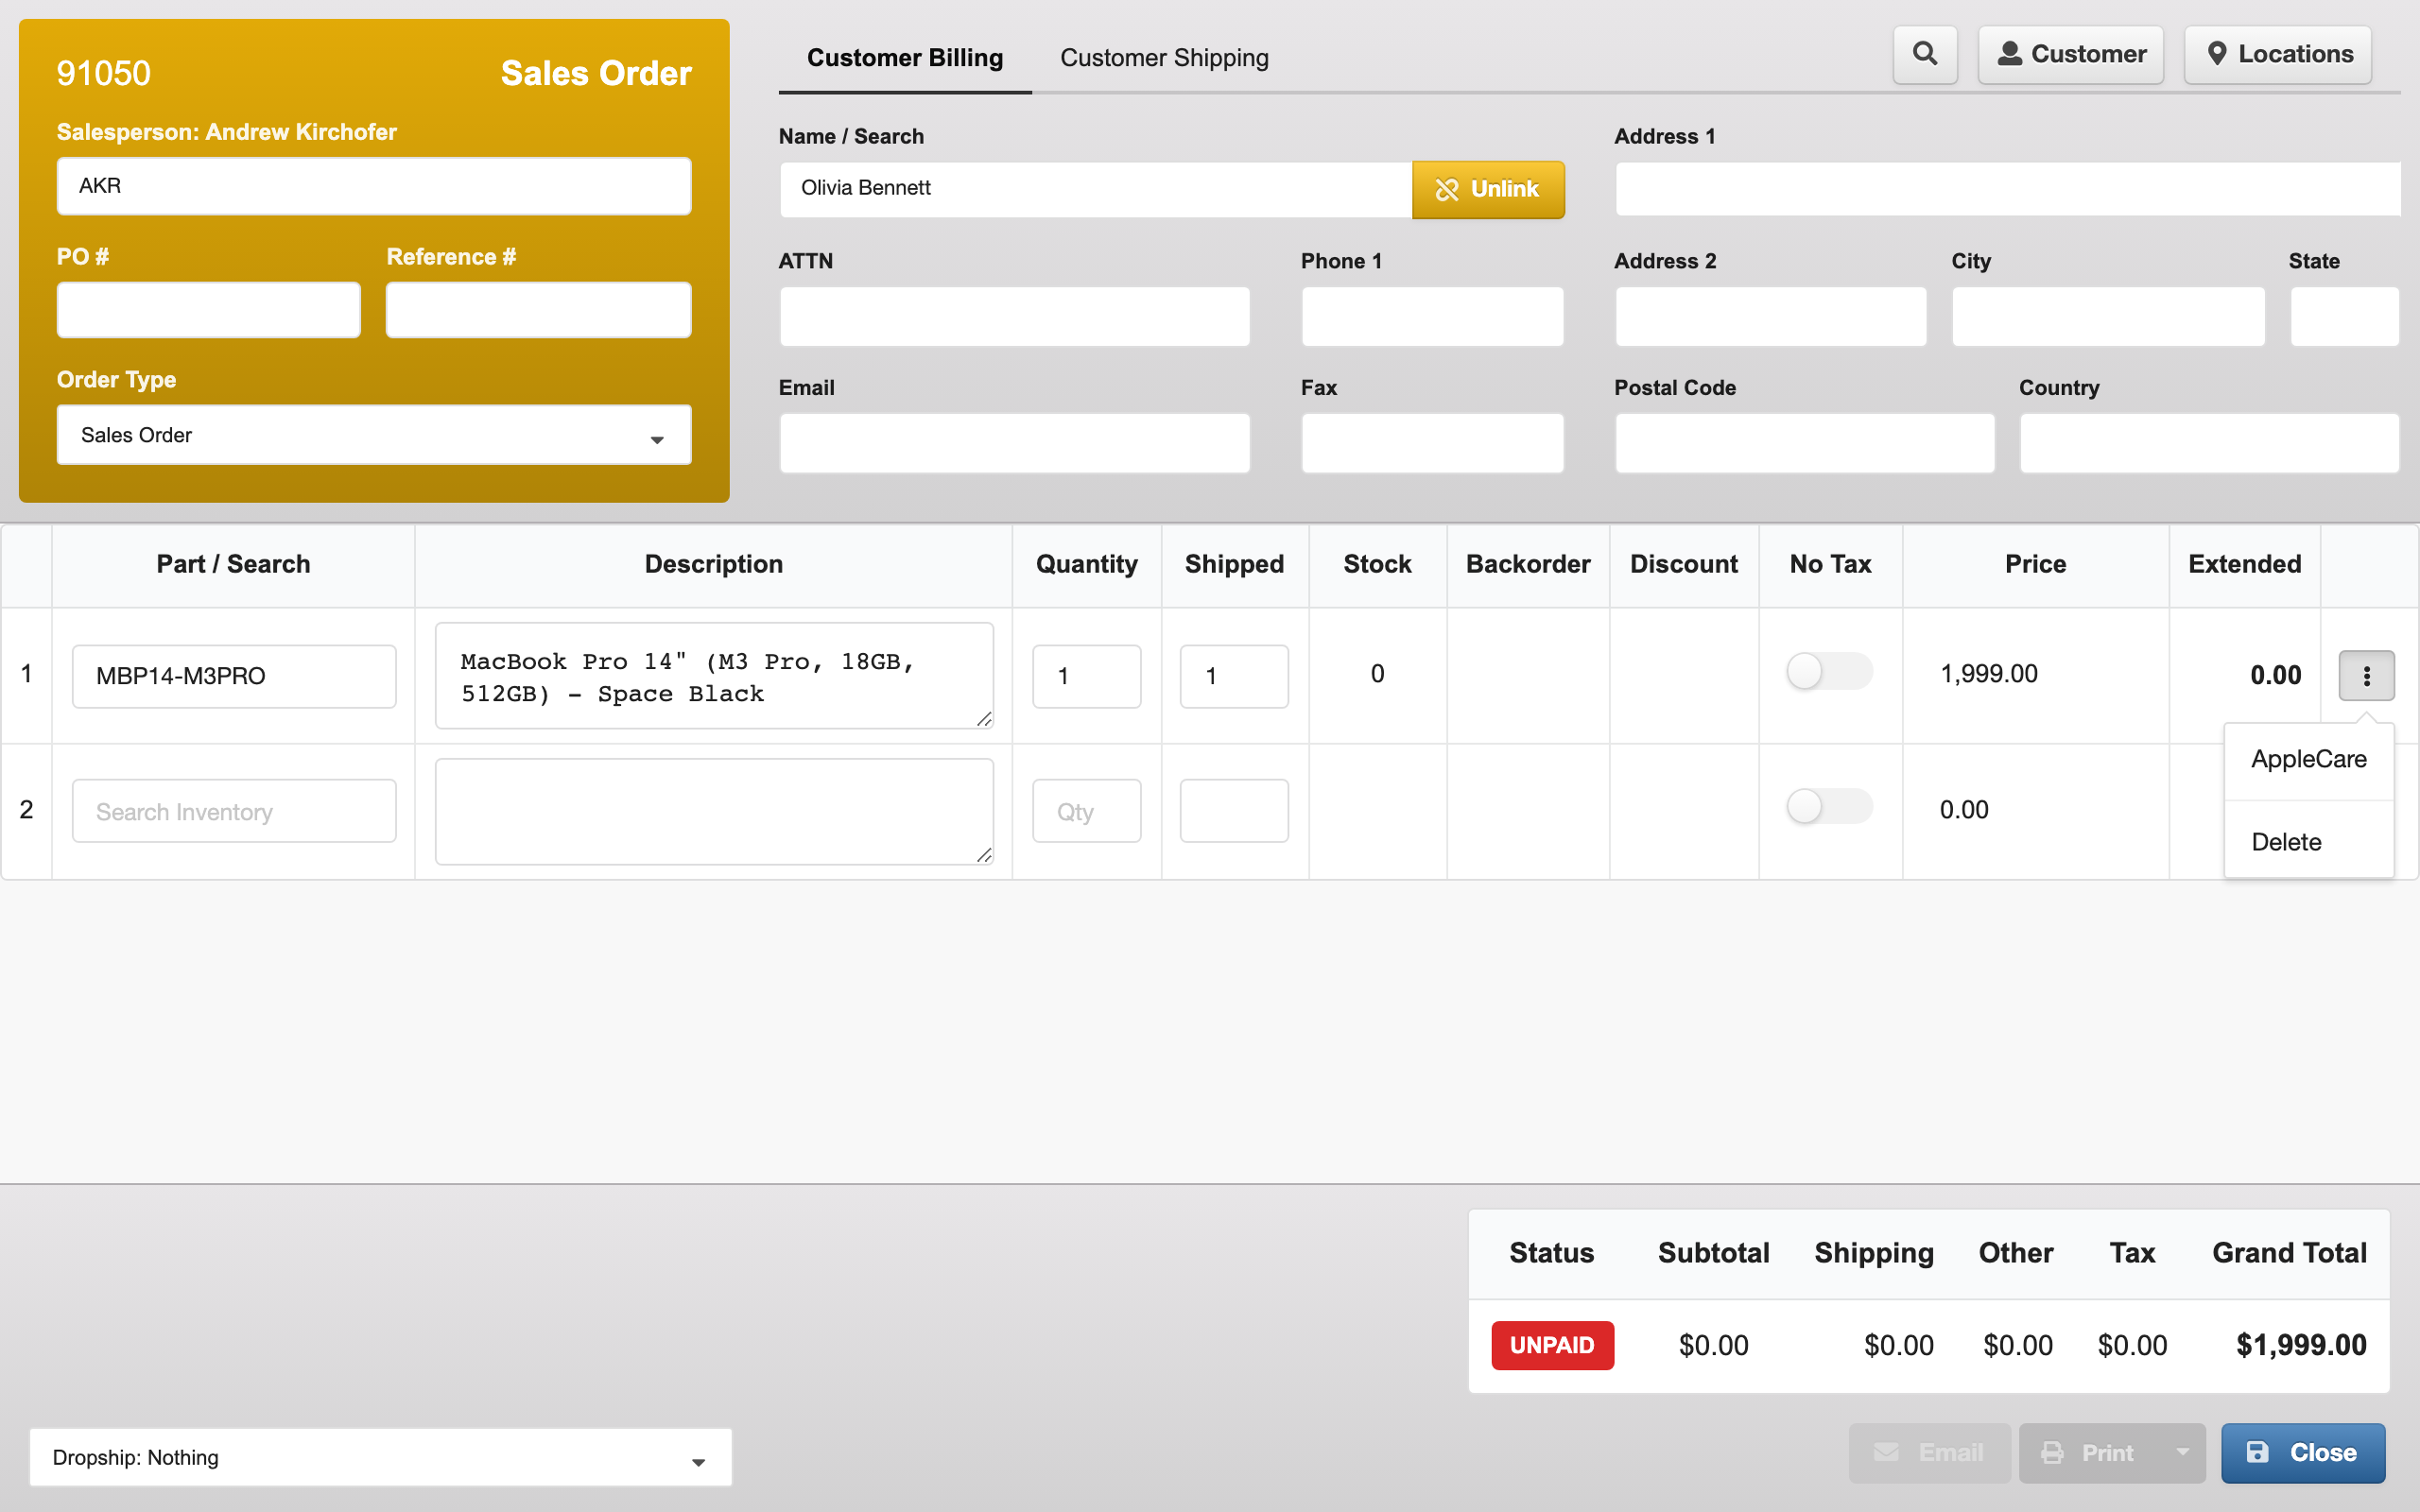
Each line in the line items table supports more than just part and quantity. Use the row's action menu (the three-dot icon at the end of the row) to access:
Serial numbers
For serialised inventory, POS prompts you to assign a serial number to each unit on the line. If you forget, Weevio Cloud asks for the serials when you try to finalise the order.
AppleCare
When you add a serialised Apple product, POS can auto-load the matching AppleCare or AppleCare+ line. Once attached, the AppleCare line is linked to the device line — Weevio Cloud warns you if you try to edit the AppleCare line independently of the device it covers.
Discounts and price codes
The Discount column opens a dialog where you can:
- Apply a PIMS price code (for example, B2B or staff pricing)
- Set a percent or flat-dollar discount on the line
- Remove a previously applied discount
- Apply the customer's default price code to every line in one click
Non-taxable lines
Toggle the Non-Taxable column on a line to remove sales tax for that specific item — useful for resale, charity, or tax-exempt customers.
Stock validation
If you enter a quantity higher than the location has on hand, POS shows a stock mismatch dialog with two options: reduce the quantity to what's available, or proceed anyway as a backorder. Backorder quantities are tracked separately on the line.
Customer and Shipping Options
The header section above the line items controls the customer-facing fields:
- Customer — name, account, and default billing address
- Salesperson code — defaults to the signed-in user's code; change it if another rep should get credit
- Shipping address — choose from the customer's saved addresses or enter a one-time address. Weevio Cloud validates the address against USPS and offers a correction if the entered address doesn't match a deliverable record.
- Dropship flag — mark the order as drop-shipped from a supplier rather than your stock; this changes how PIMS commits inventory.
Taking Payment
Clicking Make Payment opens the payment screen with the invoice total prefilled.
- Split the total across multiple tender types configured in PIMS (cash, card, ACH, store credit, and others).
- For credit and debit cards, payment posts to your configured processor. If your tenant charges a card surcharge, it's calculated and shown before you confirm.
- Finalising with no payment is allowed but Weevio Cloud asks for confirmation: convert the document to a Sales Order so it stays open and editable, or proceed with an unpaid invoice (typically for net-terms customers).
After a payment posts, the invoice is locked from line-item edits. Avoid taking payment until the order is final.
Printing
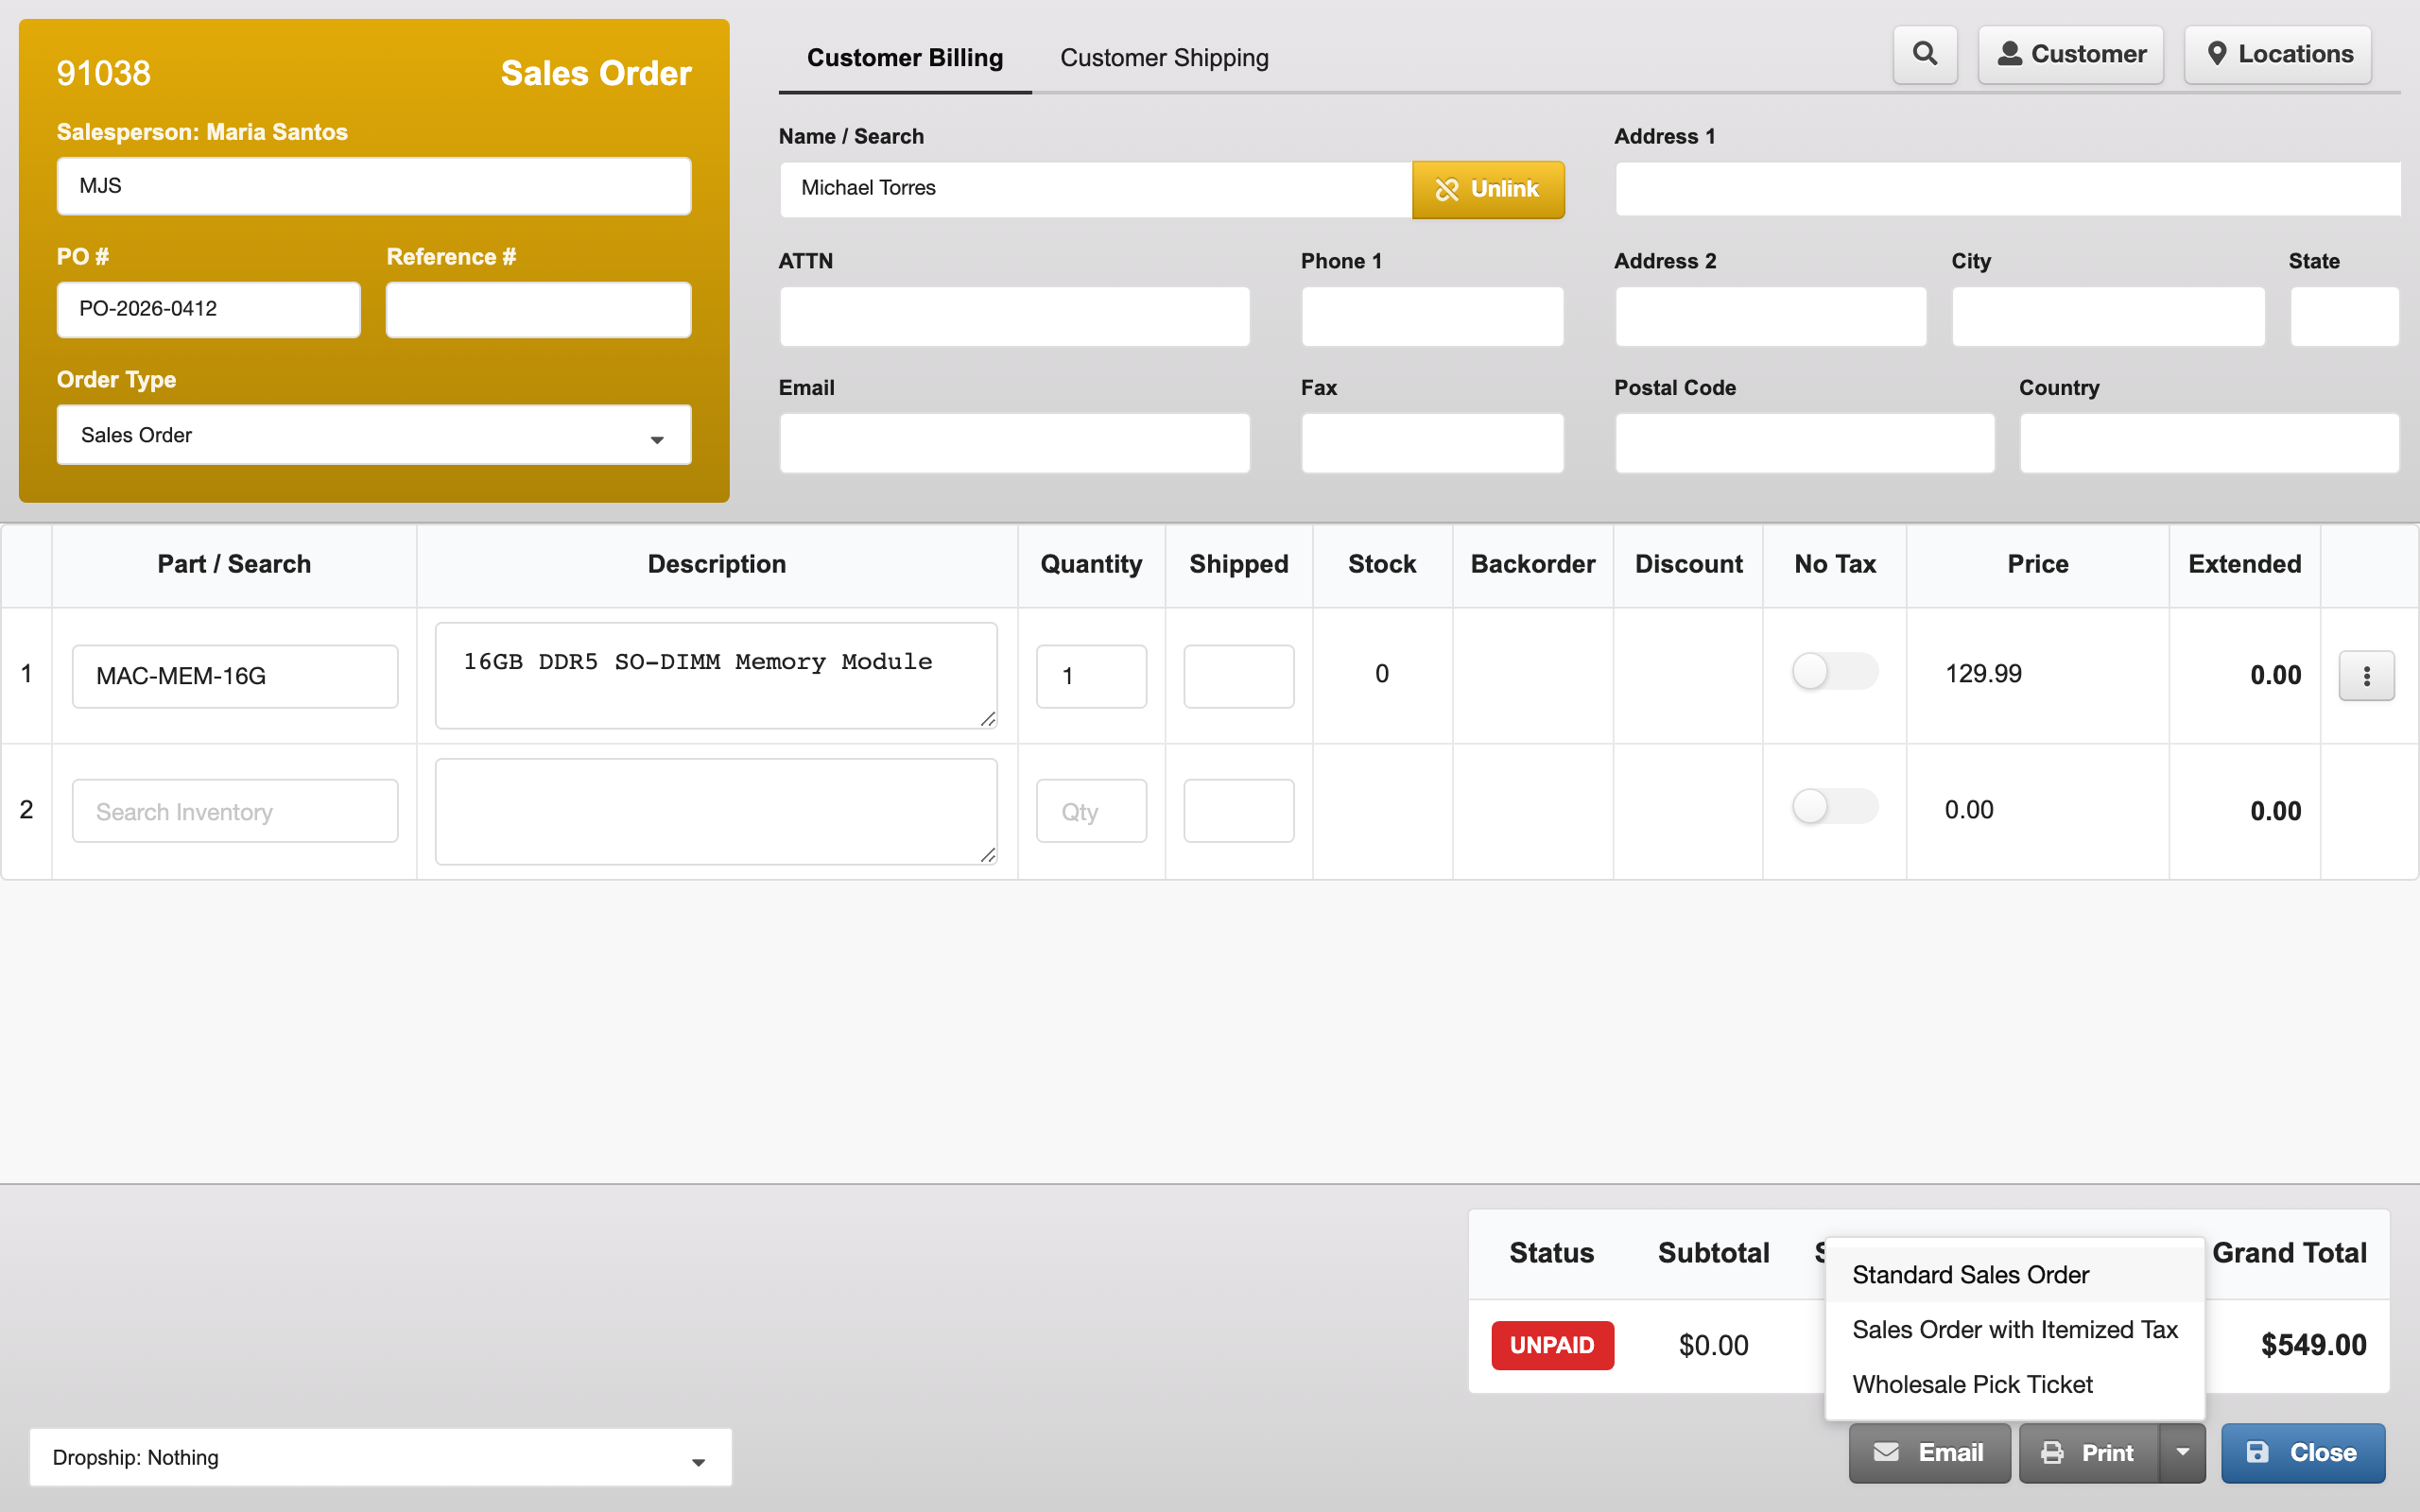
The bottom toolbar includes a print menu with:
- Default template — your tenant's standard receipt or invoice layout
- Forms Designer templates — any custom templates your admin has built in PIMS Forms Designer
- Receipt + SRO summary — combined receipt for transactions that include an SRO deposit
Tips
- Convert to Invoice only when payment is ready. Once paid, an invoice is locked. Stay as a Sales Order if the customer might still want to add or change lines.
- Apply customer price codes in one click. If the customer record has a default price code (B2B, employee, etc.), the discount dialog can apply it across every line at once.
- Backorder vs. reduce. When a line exceeds available stock, the dialog lets you either reduce to what's on hand or proceed as a backorder — pick based on whether the customer will wait.
Related
- POS SRO — counter intake for repairs
- Orders — managing orders after they're created
- Customer Management — customer records and history
- Inventory — product lookup and stock levels
Need Help?
For assistance, please send a message to our Support page.