To use the GSX integration, you must authenticate Weevio Cloud with Apple GSX and configure each location that performs GSX-backed repairs.
Before you begin
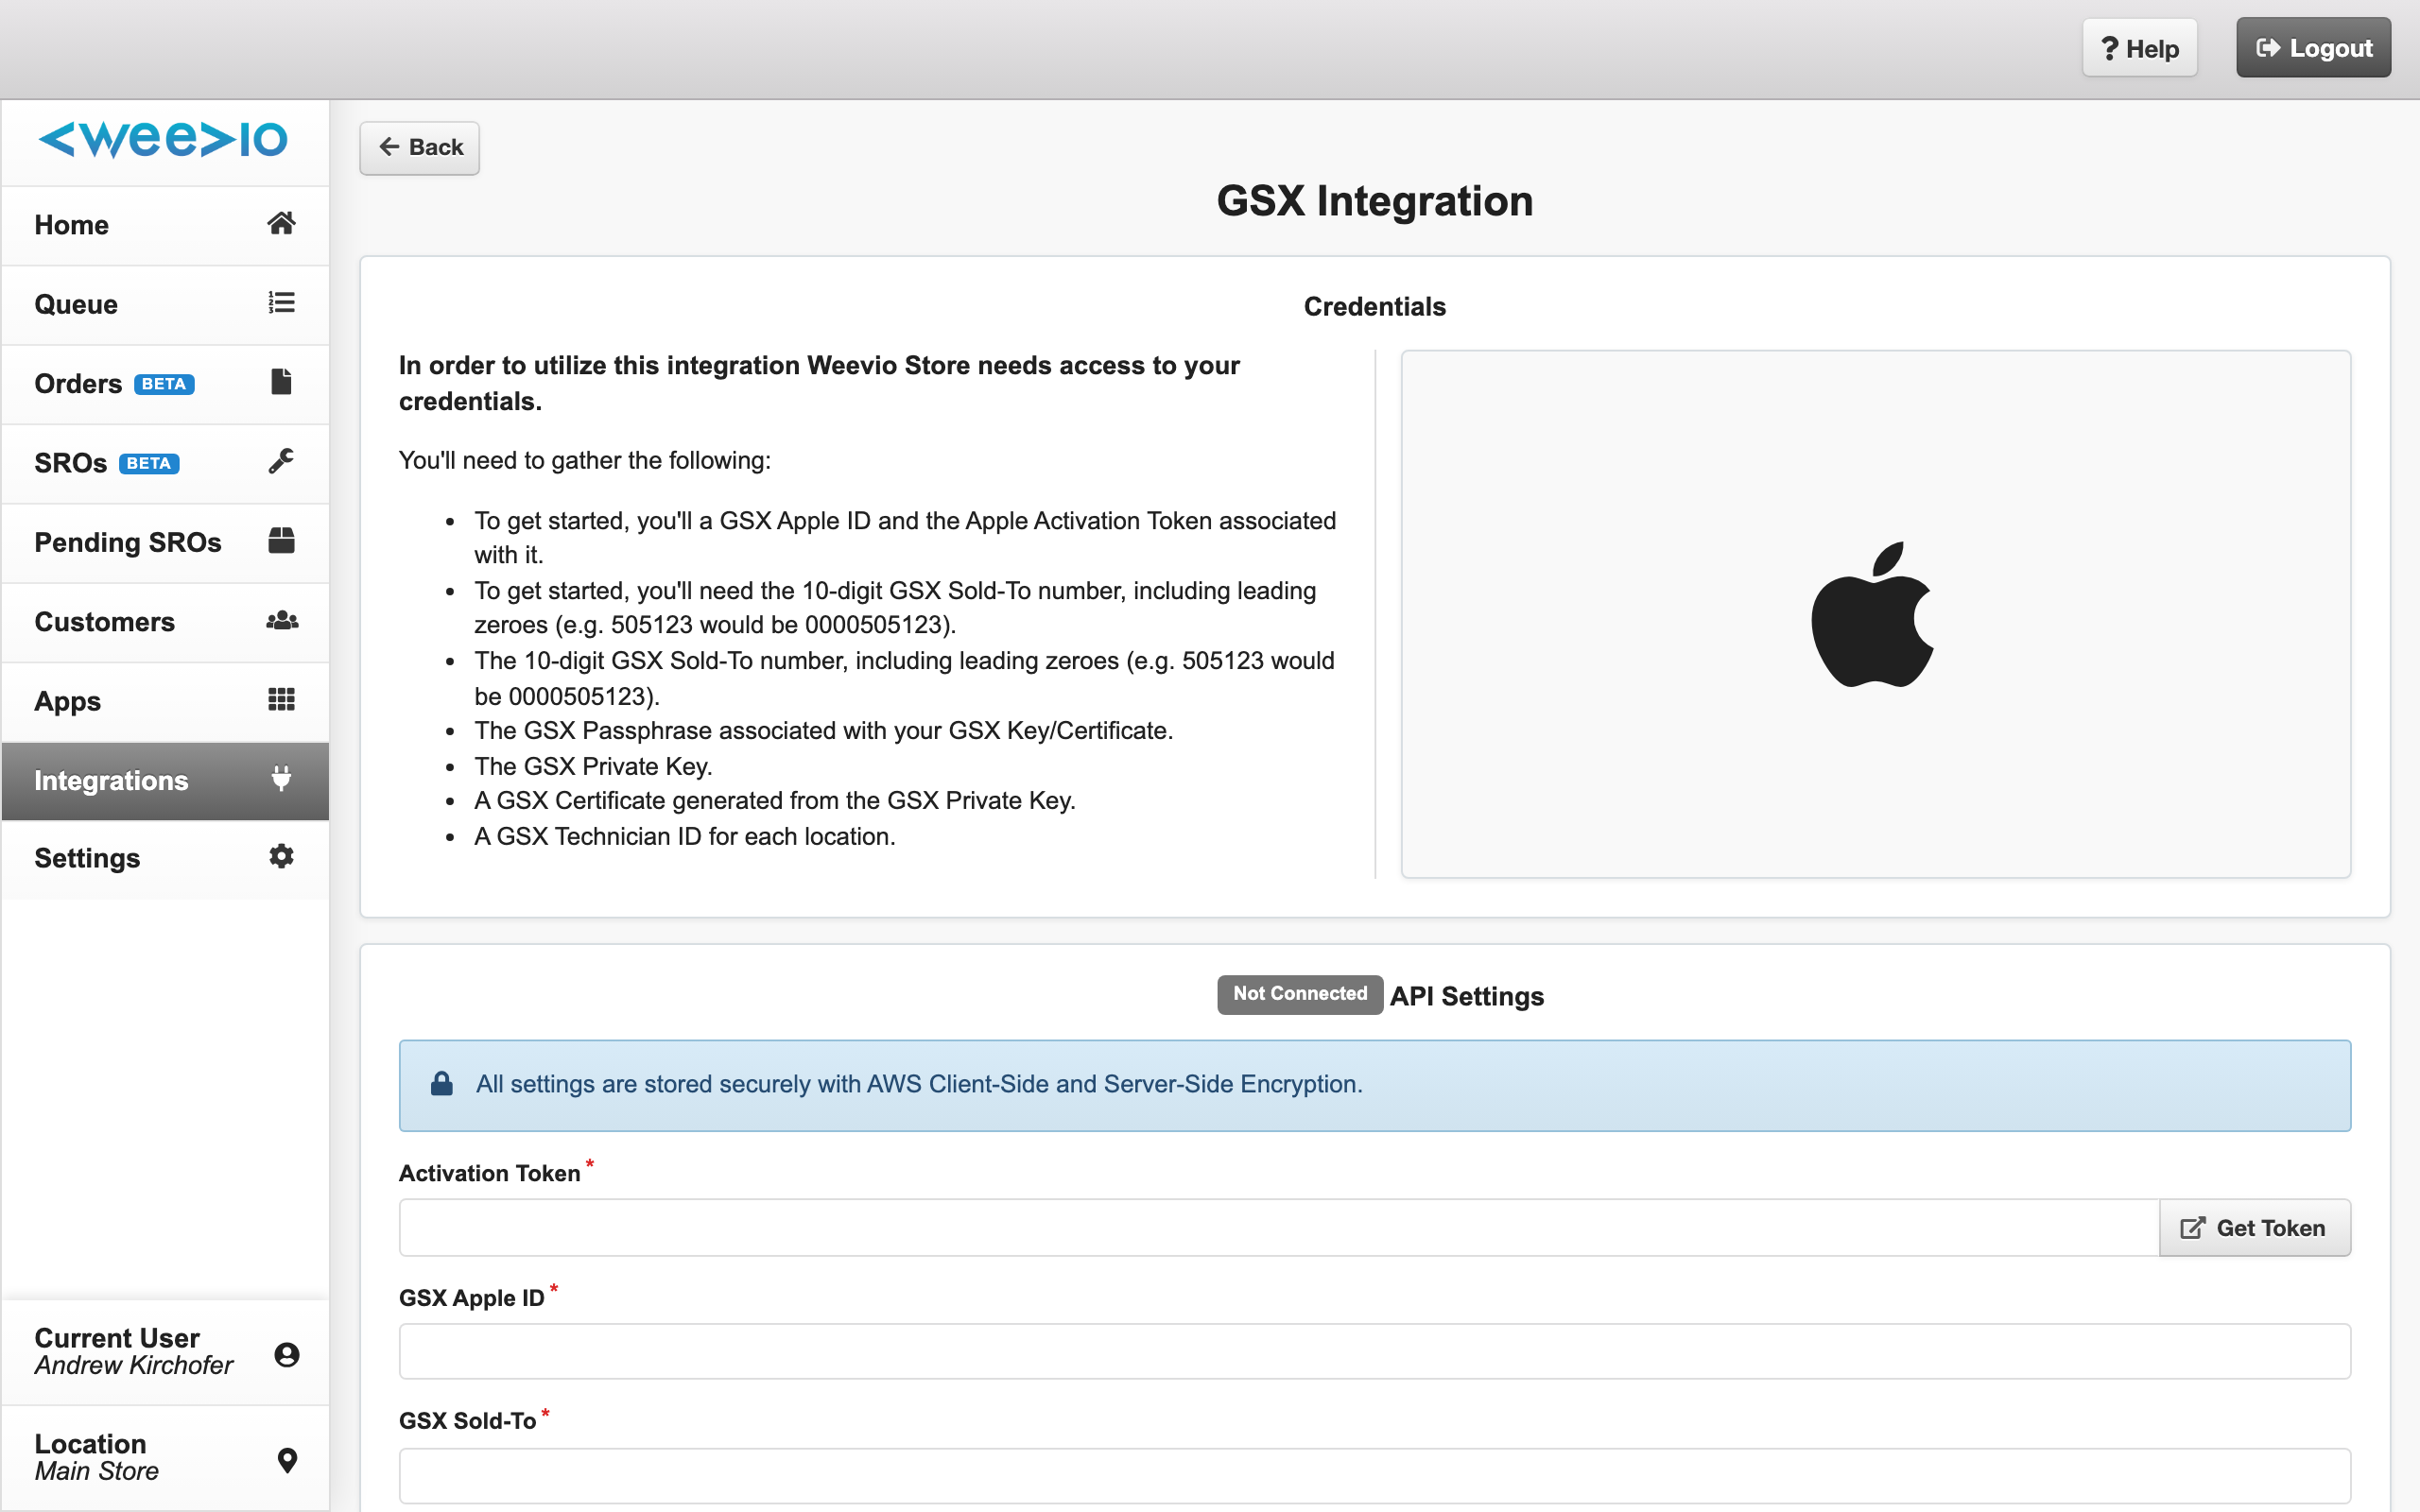
Gather the following from your Apple Partner Connect account:
- A GSX Apple ID and the matching Apple Activation Token (you can retrieve a fresh token at login-partner-connect.apple.com)
- Your 10-digit GSX Sold-To number (include leading zeroes — for example,
505123becomes0000505123) - The GSX Passphrase associated with your GSX Key and Certificate
- Your GSX Private Key file (the
...PRIVATEKEY.pemfile) - A GSX Certificate generated from the private key (the
...CHAIN.pemfile) - A GSX Technician ID for each location that will service Apple devices
Note:
Credentials are stored using AWS client-side and server-side encryption. Only people you grant access to the Integrations hub can view or change them.
Open the GSX integration
Open the Integrations hub
From Weevio Cloud, navigate to the Integrations page. The GSX tile shows an Apple icon, the description "Manage Apple Appointments with Weevio Store," and the live connection status.
Open the GSX settings
Click the GSX tile to open the GSX Integration settings page.
Enter your GSX credentials
The API Settings section is where you connect to Apple GSX.
Enter your Apple ID and Activation Token
Type your GSX Apple ID (must be a valid email address) and paste the Activation Token value. Use the Get Token button to open Apple Partner Connect in a new tab if you need a fresh token.
Enter your Sold-To number
Type your 10-digit Sold-To number, including any leading zeroes. The field is capped at 10 characters.
Enter your passphrase
Type the GSX Passphrase associated with your private key and certificate.
Upload your private key and certificate
Click to select your ...PRIVATEKEY.pem file, then select your ...CHAIN.pem certificate file. Only .pem files are accepted. Then click Upload Private Key and Certificate.
A green check appears next to each file when it has been uploaded successfully. The certificate expiration date is shown inline so you can see at a glance how long your certificate has left.
Verify the connection
Click Verify Connection. Weevio Cloud will run an authentication check against Apple GSX and show the result. If verification fails, see Troubleshooting.
The button stays disabled until all five inputs — Apple ID, Activation Token, Sold-To, private key, and certificate — are filled in.
Note:
Re-verify the connection any time you upload a new certificate or change the activation token.
Set the API notification email
In the Notifications section, enter the email address that should receive Apple GSX token-expiration warnings. Weevio Cloud automatically clears these notifications once a valid token is in place again.
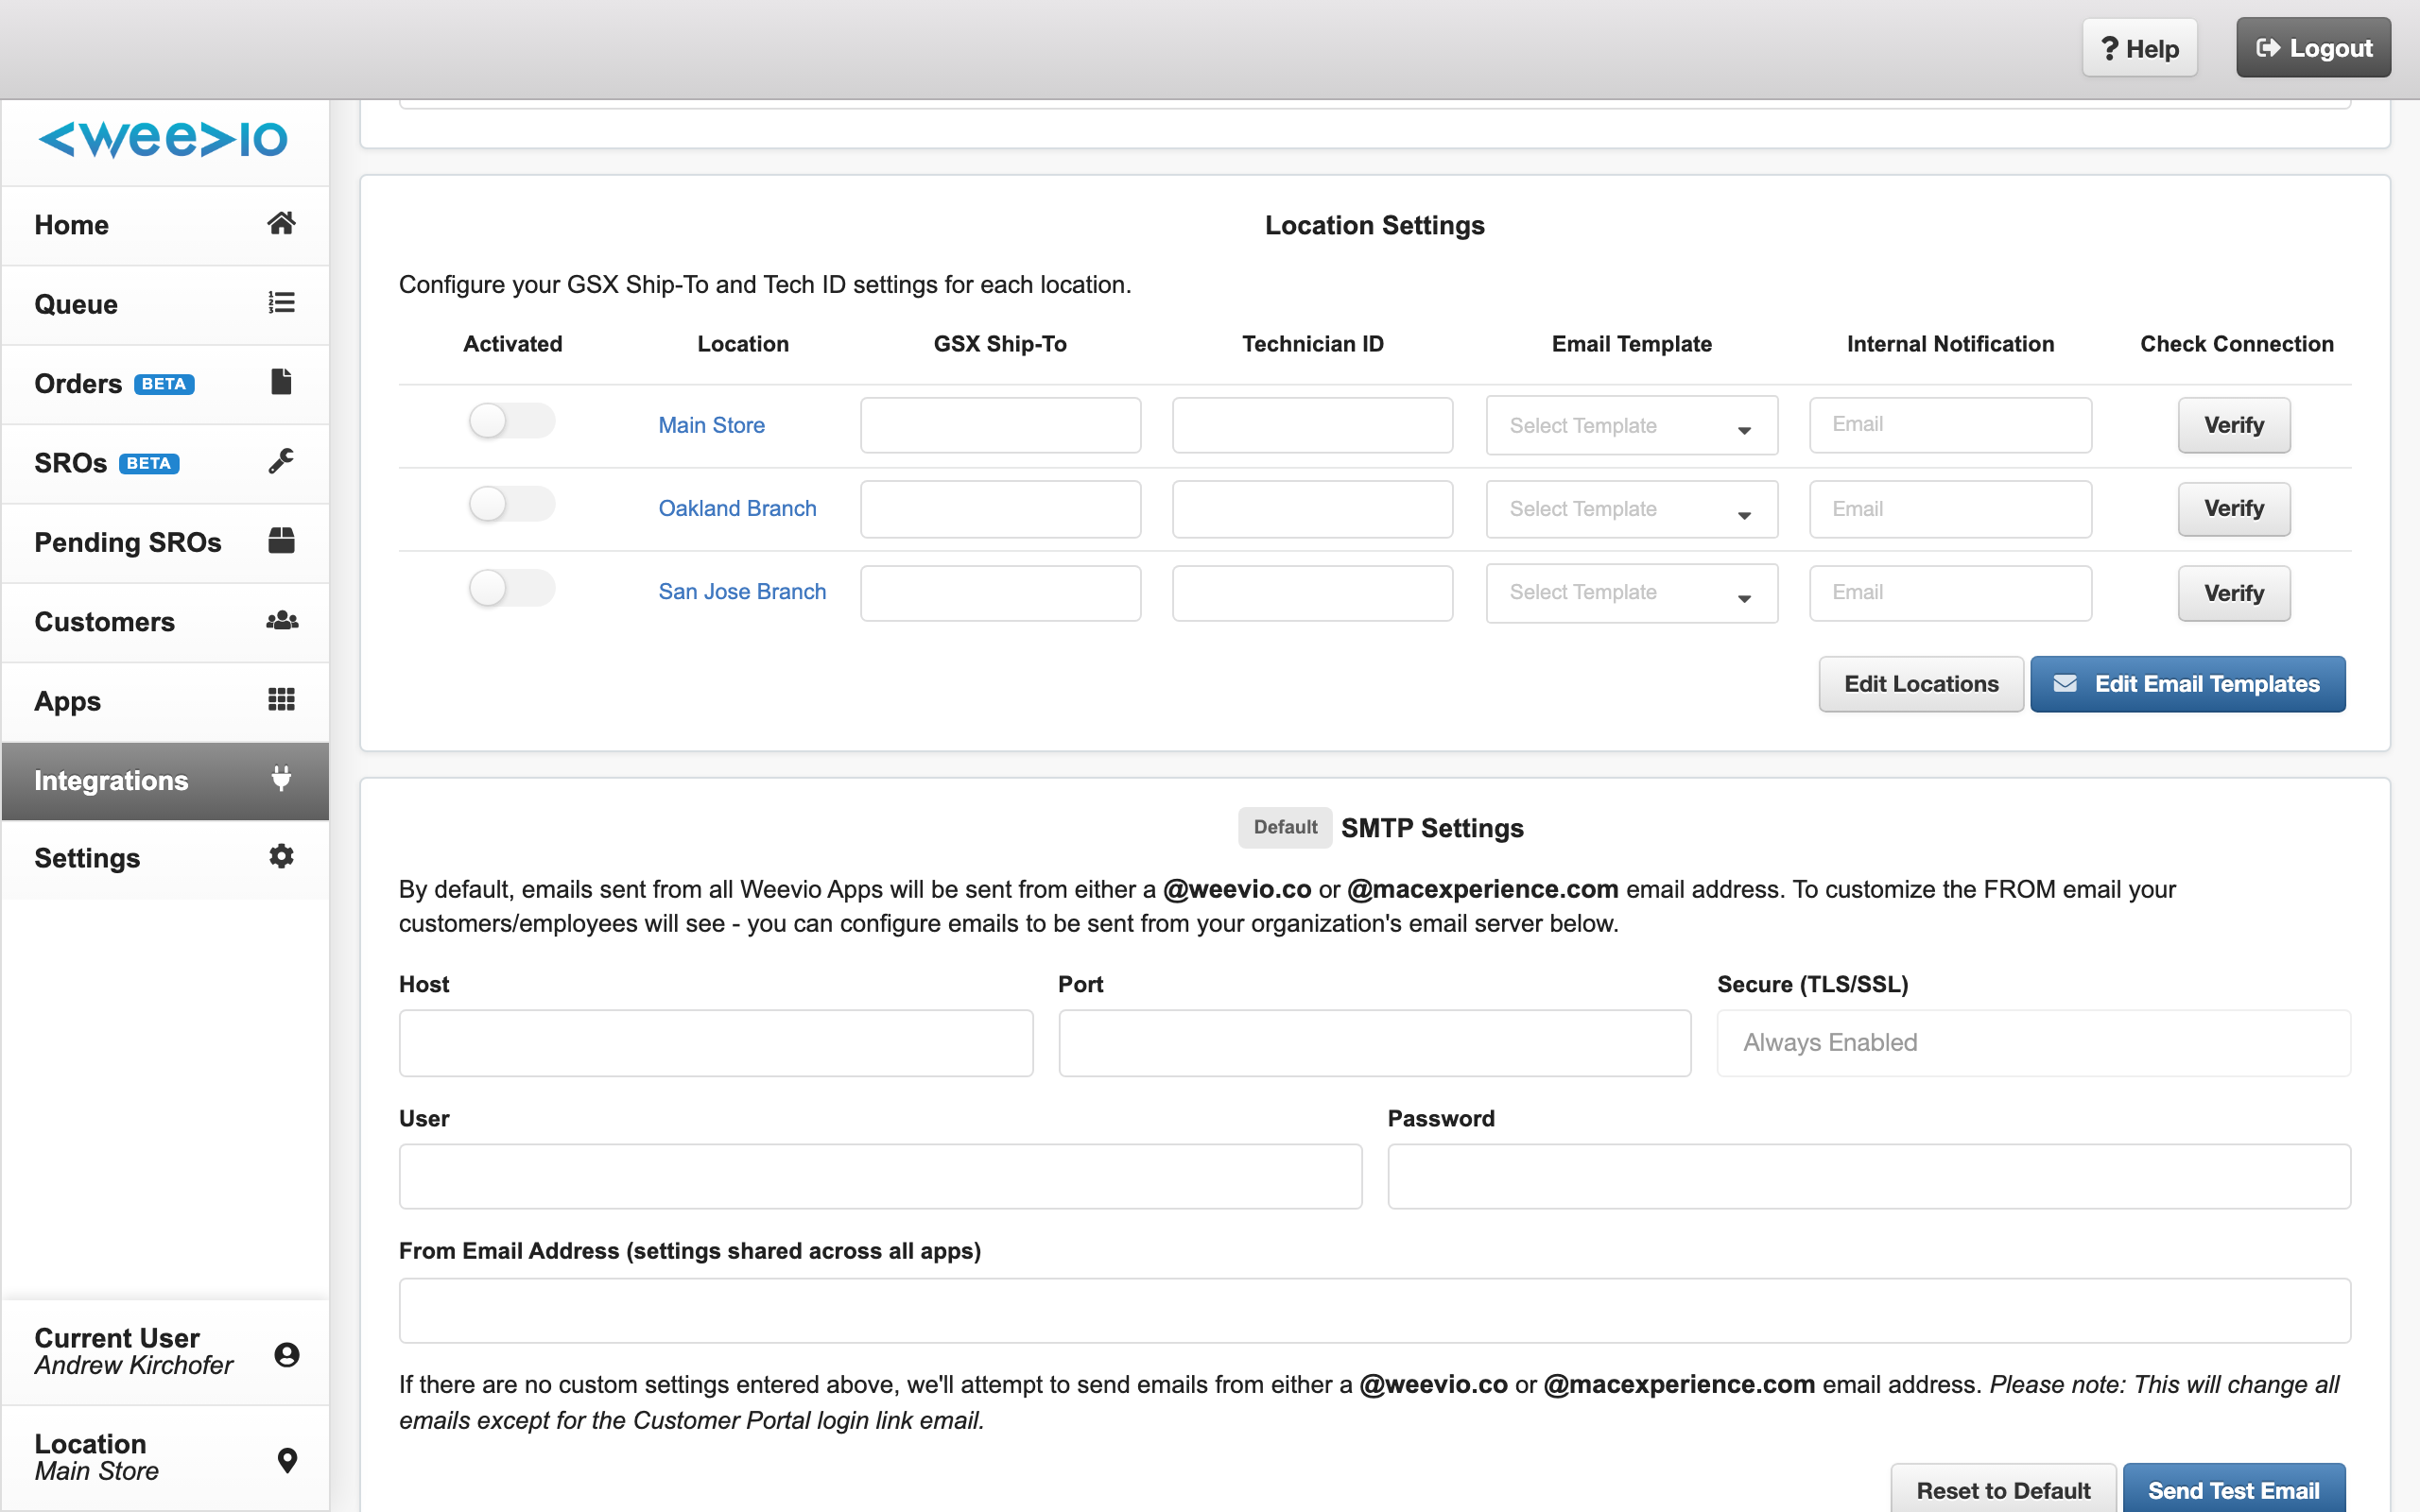
Configure each location
Each store location that will perform GSX-backed repairs needs its own Ship-To and Technician ID. Locations are managed in the Location Settings section of the GSX page.
For each location, set:
| Field | Description |
|---|---|
| Activated | Toggle on to enable GSX for this location. |
| GSX Ship-To | The 10-digit Ship-To code for this physical store. |
| Technician ID | The GSX Technician ID assigned to this location. |
| Email Template | The GSX Notifier email template that confirms appointments for this location. |
| Internal Notification | An internal email address that receives appointment-related notifications for this location. |
Click the Verify button on a row to test the connection for that specific location. Click the location name to open the Calendar Subscription URL modal — you can paste this URL into Apple Calendar (or any iCal-compatible client) to subscribe to the location's GSX appointment feed.
Note:
The Edit Locations button takes you to General Settings, where you can add and rename locations. The Edit Email Templates button opens the GSX Notifier email template editor — see Automated Email Workflows.
Next steps
Need Help?
For assistance, please send a message to our Support page.