The GSX Notifier sends customer-facing email confirmations whenever a GSX appointment is booked, rescheduled, or cancelled. You can create multiple templates, brand them with your logo and banner color, and pick a different template for each location.
Open the email template editor
From the GSX Integration settings page, click Edit Email Templates in the Location Settings section. You can also reach the editor directly from Settings → GSX Notifier → Email.
Manage templates
The editor shows your existing templates plus a button to create new ones.
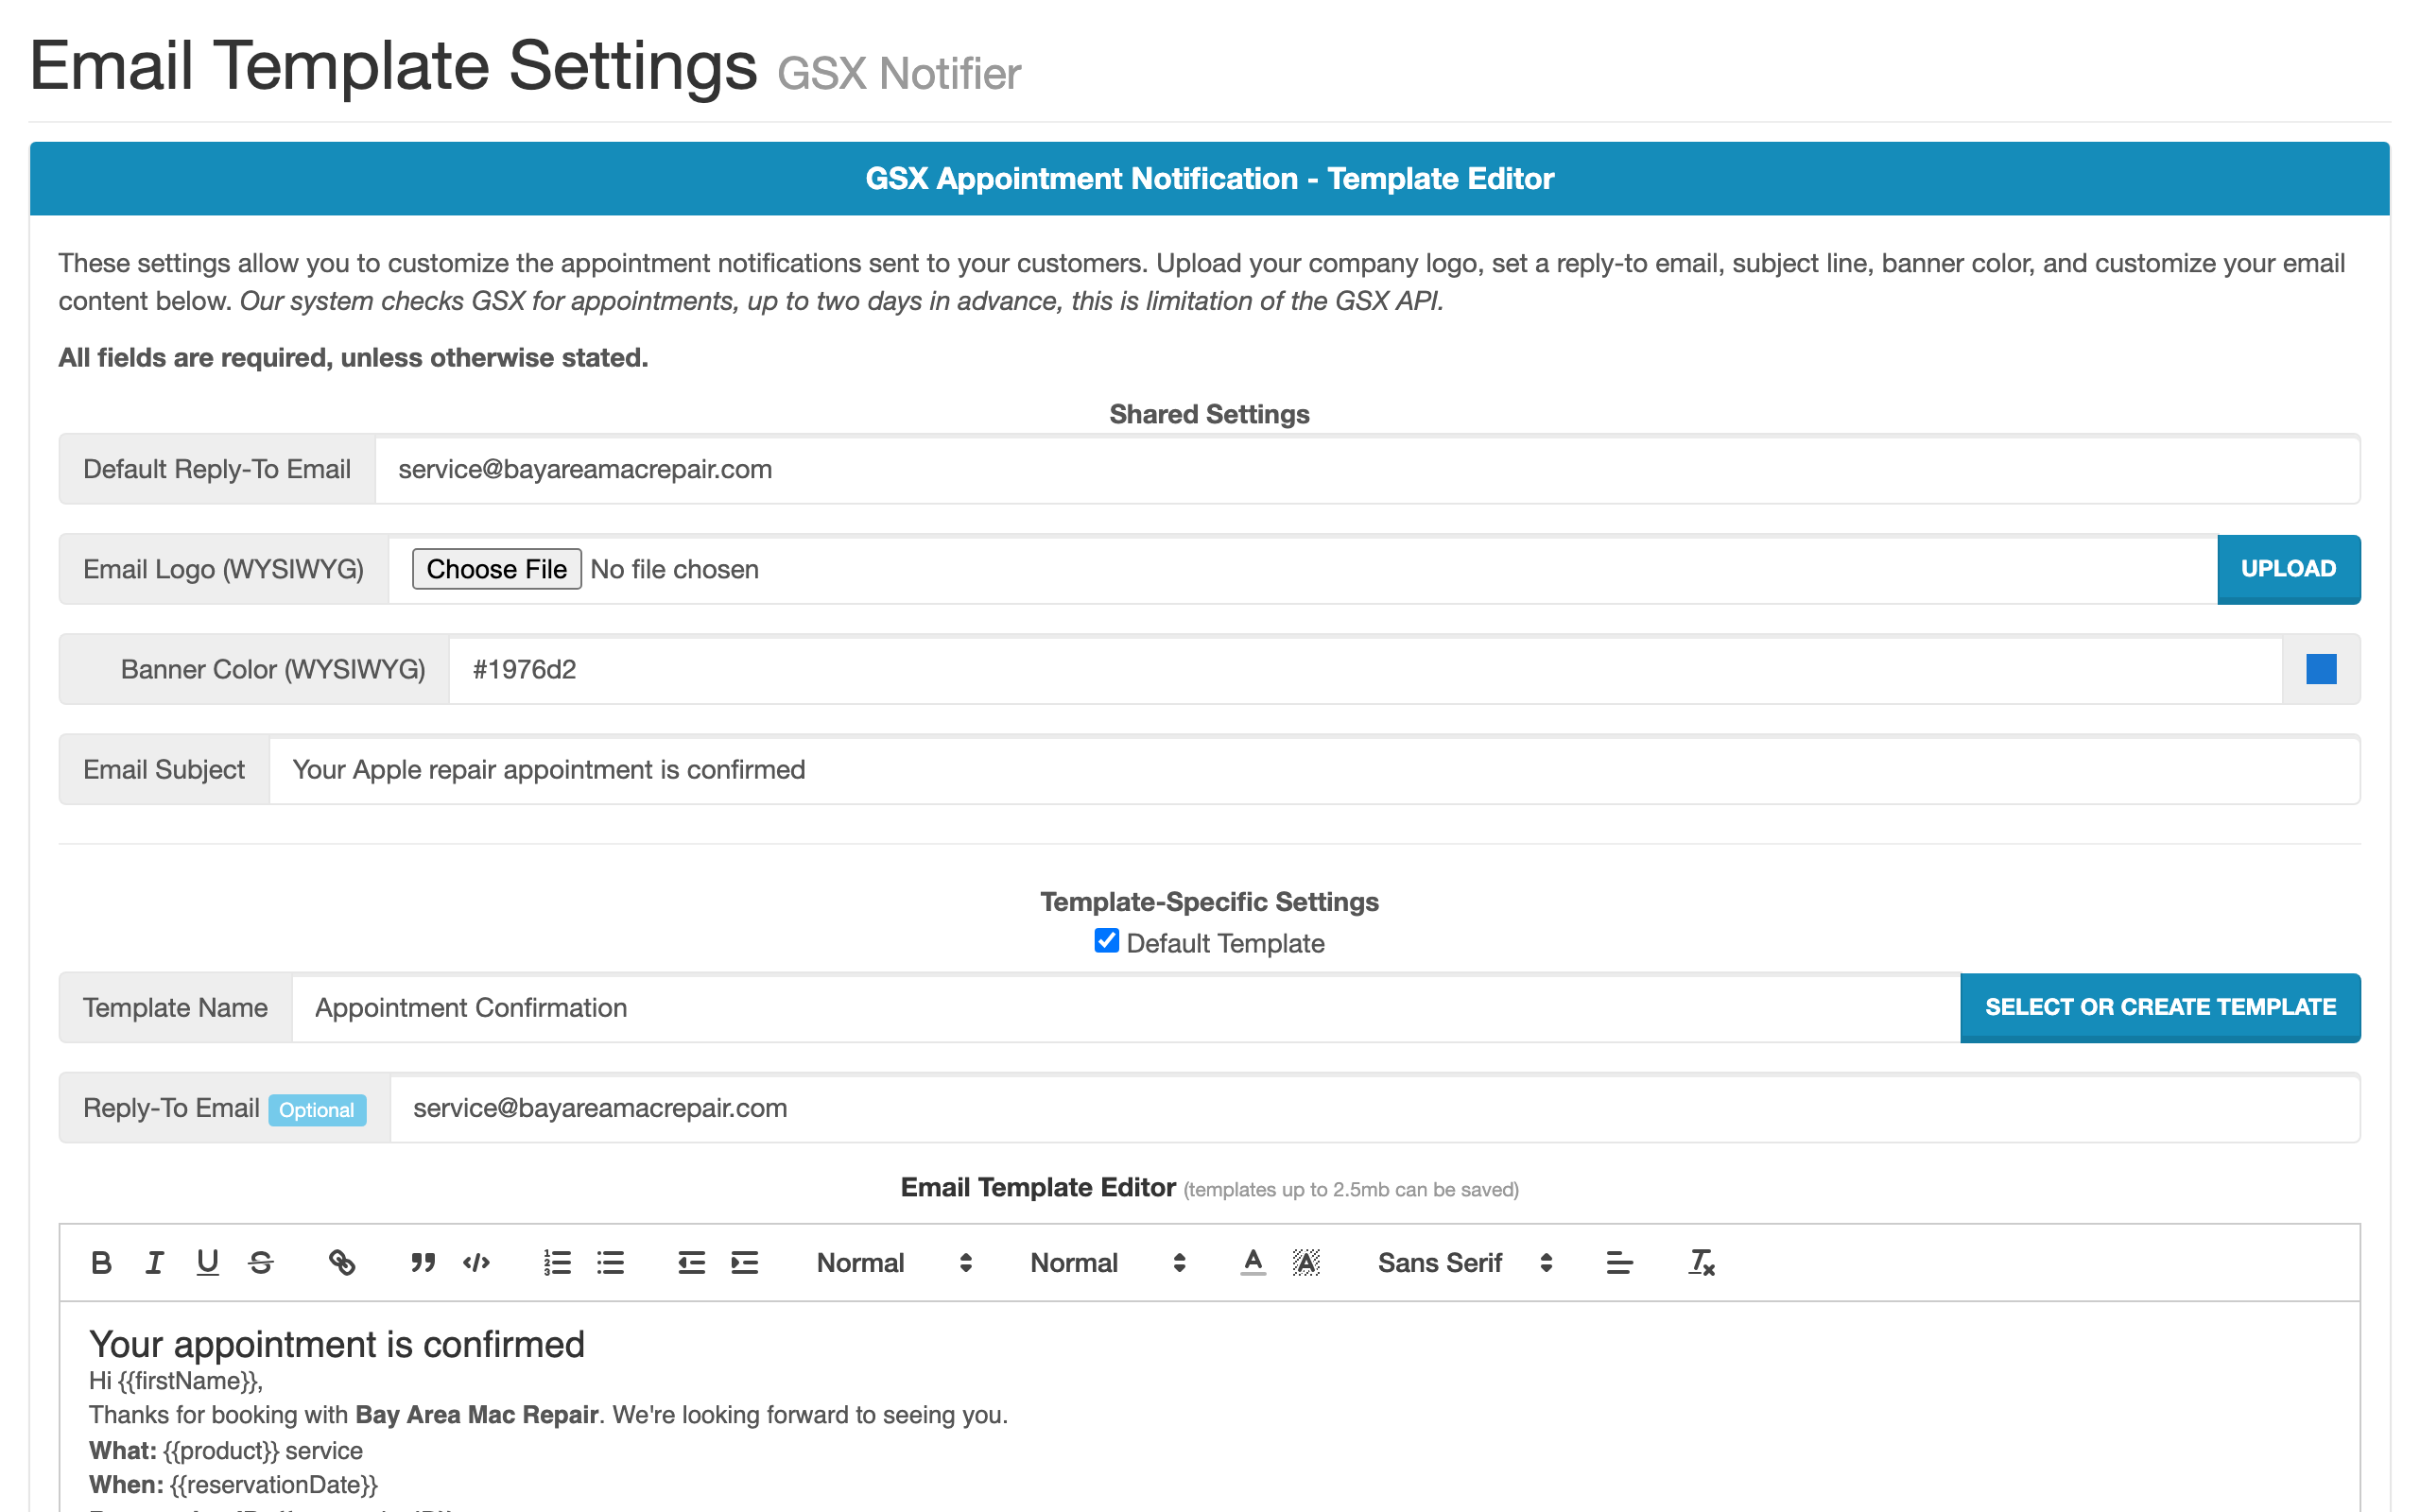
Each template has the following fields:
| Field | Description |
|---|---|
| Name | A label for the template (visible only to staff in the dropdown). |
| Default | Mark one template as the default. New locations use the default until you assign a different template. |
| Subject | The email subject line customers see. |
| Body | The email content, edited in a rich-text editor. You can switch between rich-text and raw HTML mode. |
Note:
If you delete a template that one or more locations are using, those locations automatically fall back to the Default template.
Set global email settings
Above the template list, you can configure settings that apply to every GSX Notifier email:
- Reply-To email — the address customers reach when they reply to a confirmation
- Customer notify email subject — a global subject prefix or fallback
- Logo — upload a logo image; it appears in the email header
- Banner color — a hex color that brands the top banner of each email
Pick a template per location
Each location can use its own template. Set this in the Email Template column of the Location Settings table on the GSX integration settings page.
Subscribe to a location's appointment calendar
Each location publishes a read-only calendar feed of its GSX appointments. To subscribe:
Open the GSX integration settings
From the Integrations hub, click the GSX tile.
Click a location name
In the Location Settings section, click the name of the location whose calendar you want to subscribe to. The Calendar Subscription URL modal opens.
Copy the calendar URL
Copy the URL shown. It includes your team ID and the location's GSX Ship-To code so the feed is unique to that store.
Add the calendar to your client
In Apple Calendar, choose File → New Calendar Subscription and paste the URL. The same URL works with any iCal-compatible calendar client.
Note:
The feed is read-only. Edits made in your calendar client do not push back to Apple GSX. To change an appointment, use the Appointment Scheduler in Weevio Cloud.
Related documentation
- Setup & Authentication — connect Weevio Cloud to Apple GSX and configure each location
- Appointment Scheduler — GSX Integration — how customers book GSX appointments
Need Help?
For assistance, please send a message to our Support page.